In Step 3, you specify which fields appear in which places in the report. The way you do that is by dragging a field name from the Available fields list to the appropriate section.
For example, to use the Amount field as a data field, select it in the list and drag it to the Data fields section. Any fields left in the Available list are not used in any way in cross-tab reports.
You can have more than one field in each section; simply drag as many fields as you wish to the appropriate place. Note that having more than one field in a section makes the report more complex, use more pages, and take longer to run, especially if you use more than one column field. The order in which you drag the fields is the order in which they appear in the box and the order in which they appear in the report. To change the order in which the fields appear, simply drag the field up or down in the section.
To remove a field from a section in the report, drag it from the appropriate box back to the Available fields list.
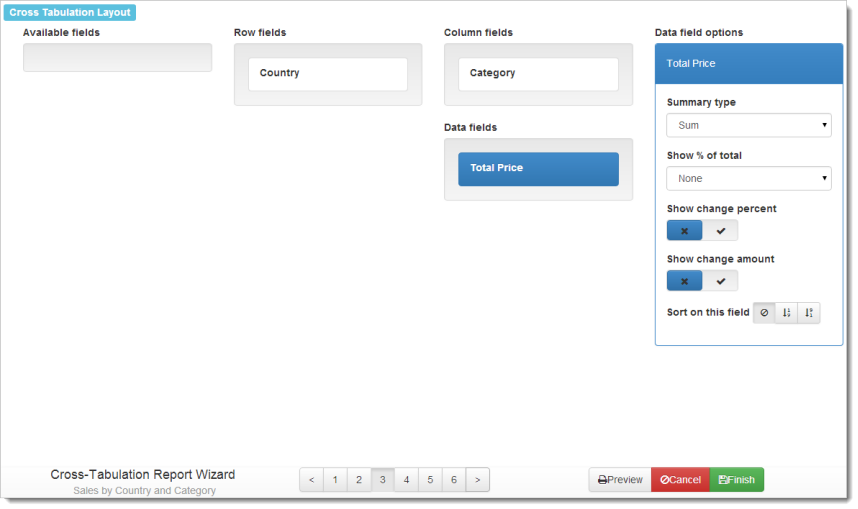
Fields in the Data fields list show the summary type for the field, which by default is Sum for numeric fields and Count for all other field types. To change the properties of fields in this list, select it to display its properties in the Field options section. The choices are:
-
Summary type: this option allows you to specify whether a total (“sum”), count, average, highest, or lowest value appears for this field.
-
Show % of total: choose the desired setting to show the percentage that each value is of the total. None means that no percentage is shown, Row means show the value as a percentage of the row total, and Column means show the value as a percentage of the column total.
-
Show change percent: turn this option on to show the percentage difference between a column and the previous column.
-
Show change amount: this option is similar to Show change percent but shows the amount difference between the two columns.
-
Sort on this field: by default, the report is sorted alphabetically by the row fields. However, if you want the results sorted on the row grand total of the data field in ascending (from lowest to highest) or descending (highest to lowest) order, click the appropriate button:
 or
or  . Click the
  button to turn off sorting on the data field and revert to sorting on the row fields.
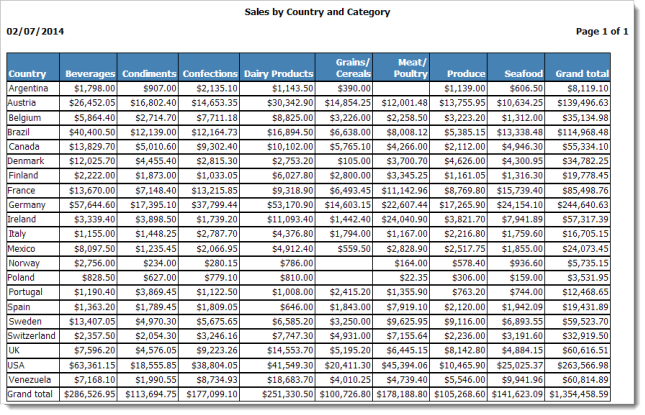
For example, here’s a report that isn’t sorted on the data field. Notice that it’s in alphabetical order by country.
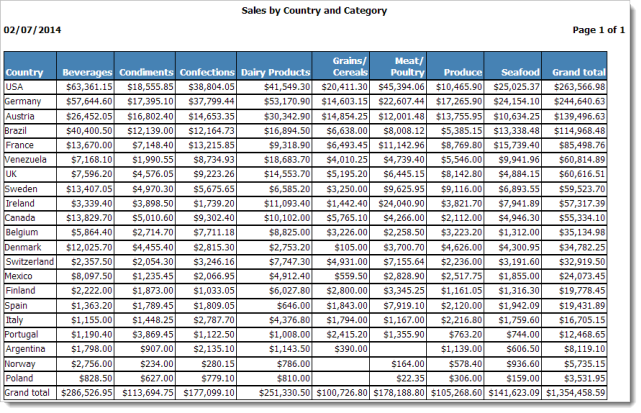
This one is sorted in descending order on the data field, so the countries with the largest total sales are at the top.
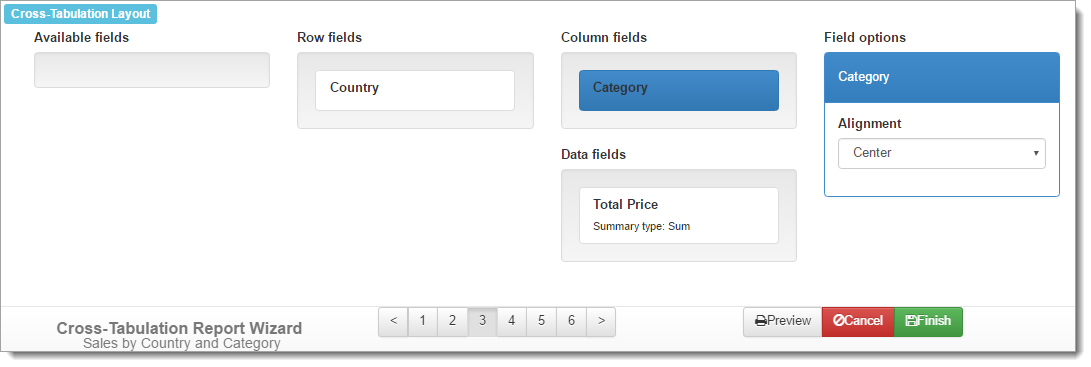
To change the properties of fields in the Column fields list, select it to display its properties in the Field options section. The choices are:
- Alignment: this option allows you to specify the alignment (Left, Center, Right) of the text in the column header section.

To change the properties of fields in the Row fields list, select it to display its properties in the Field options section. The choices are:
-
Each unique value for this field starts on new page: this option allows you to specify that each new row value starts on a new page.
-
Move to page header: this option allows you to move the label and value for the field to the page header. This is only available if you’re also starting a new page for each unique value of this field.