The Options item in the Tools menu allows you to configure Horizon Reports so it works properly for you.
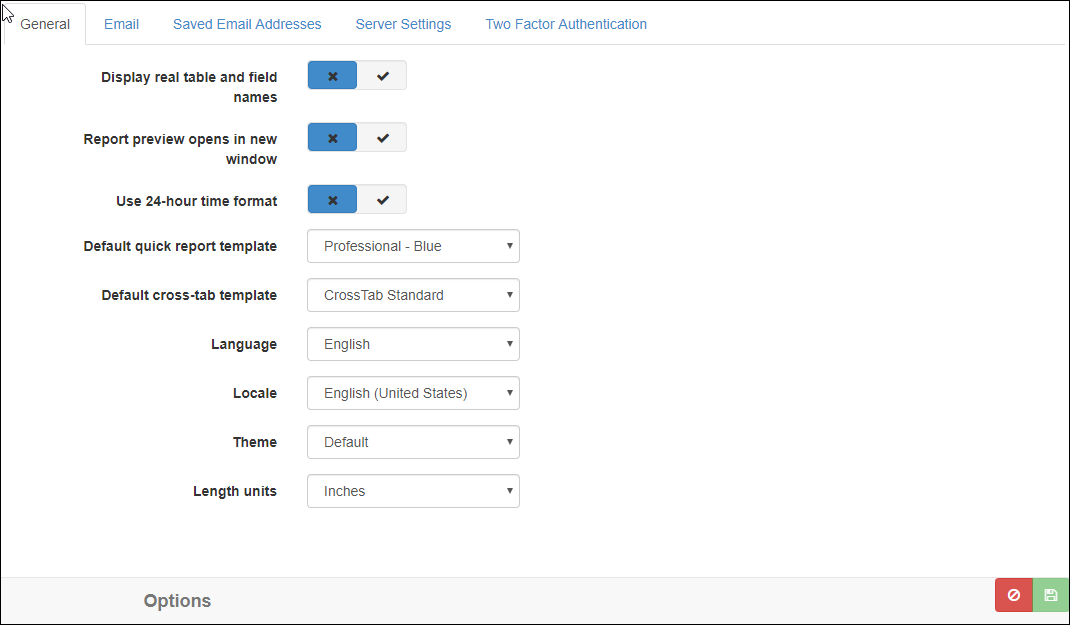
The options in the General page are:
-
Display real table and field names: if you are familiar with the name of your application’s tables and fields, you might find it easier to locate the tables and fields you want by their real names. If you turn this option on, Horizon Reports displays the real name followed by the descriptive name in parentheses.
-
Report preview opens in new window: if you turn this option on, reports are previewed in a new tab in your browser. With this option off, the Preview window appears inside the same browser tab as the rest of the dialogs.
-
Use 24 hour time format: turn this option on to display times in 24-hour format, such as 15:25:00 for 3:25 p.m. Turn it off to display times in 12-hour format, such as 3:25 PM.
-
Default quick report template: this setting determines the default template used for new quick reports.
-
Default crosstab template: this setting determines the default template used for new cross-tab reports.
-
Language: this allows you to select which language you want Horizon Reports to display in.
-
Locale: this setting determines the formatting of numeric and date values. For example, 1400 appears as $1,400.00 when Locale is set to English (United States) and 1.400,00 € when it’s set to Deutsch (Deutschland), while July 4, 1996 appears as 07/04/1996 for English (United States) and 04.07.1996 for Deutsch (Deutschland).
-
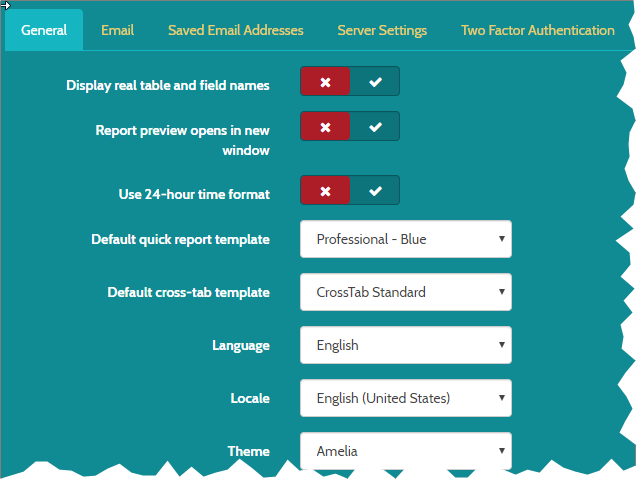
Theme: this option allows you to change the theme of the application, which affects the appearance, including colors and fonts. For example, here’s what the Amelia theme looks like:
-
Length units: this setting determines the units for measurements such as field width: inches or centimeters.
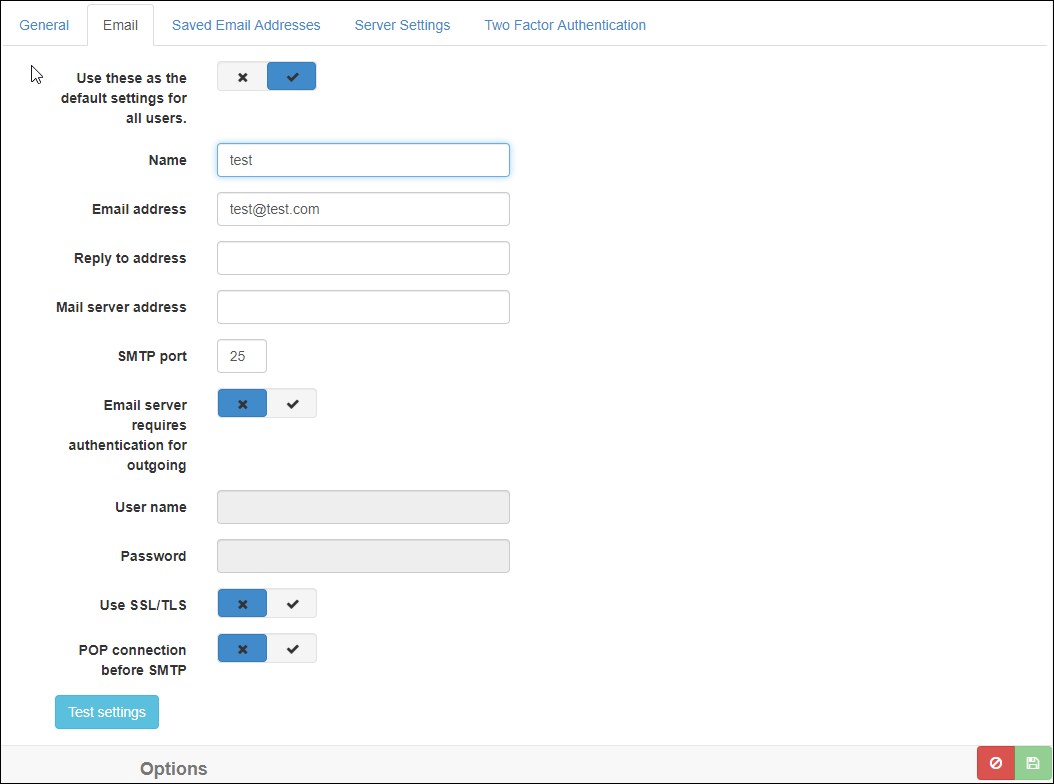
The options in the Email page are used when you want to email a report to someone or if an unexpected error occurs in Horizon Reports, in which case you have an option of emailing an error report to us so we can resolve the problem. The options are:
-
Use as default settings for all users: If this option is on, any user that doesn’t have their email settings filled in will use these settings instead to send email. This option is only visible for administrator users.
-
Name: your email descriptive name, such as “John Doe.”
-
Email address: the email address to use as the origin address for the email.
-
Reply to address: an optional email address in case you want a different reply-to than your main email address.
-
Mail server address: the address for your mail server.
-
SMTP port: the port for your SMTP mail server. This defaults to 25, but can be changed if necessary.
-
Email server requires authentication for outgoing: turn this option on if applicable.
-
User name: the user name to use if the Email server requires authentication for outgoing option is turned on.
-
Password: the password to use if the Email server requires authentication for outgoing option is turned on.
-
Use SSL/TLS: turn this setting on if your email server uses SSL/TLS.
-
POP connection before SMTP: turn this setting on if your email server requires a POP connection before using SMTP.
-
POP server address: the address for your POP mail server. This setting only appears if POP connection before SMTP is turned on.
-
POP port: the port for your POP mail server. This setting only appears if POP connection before SMTP is turned on.
Click the Test settings button to test that the email settings are correct by sending an email to the address you entered.

The Saved Email Addresses page allows you to manage any email addresses that have been saved after being entered in the export options for a report. To remove an email address that has been saved, select it in the list, and then click the  button.

The Server Settings page is only available for users in the Administrator role. The options are:
-
Run schedules under this server/domain account: turn this setting on if you want to specify the credentials (Windows user name and password) for scheduled reports. If these are filled in, the user doesn’t have to specify them when creating a schedule.
-
Use Active Directory authentication: if your system uses Active Directory and you don’t want to add users to Horizon Reports manually, turn this setting on and specify the domain name. Any Active Directory users in that domain are automatically Horizon Reports users.
-
Memory limit for split query: this setting allows you to place a limit on the amount of server memory a split query can occupy. In certain circumstances, like if you filter on a formula, it’s necessary to split up the request for report information in to several steps. This process can tie up a large amount of server memory while the report is running. If resources on the server are limited, this option can help prevent problems with other applications running on the server.
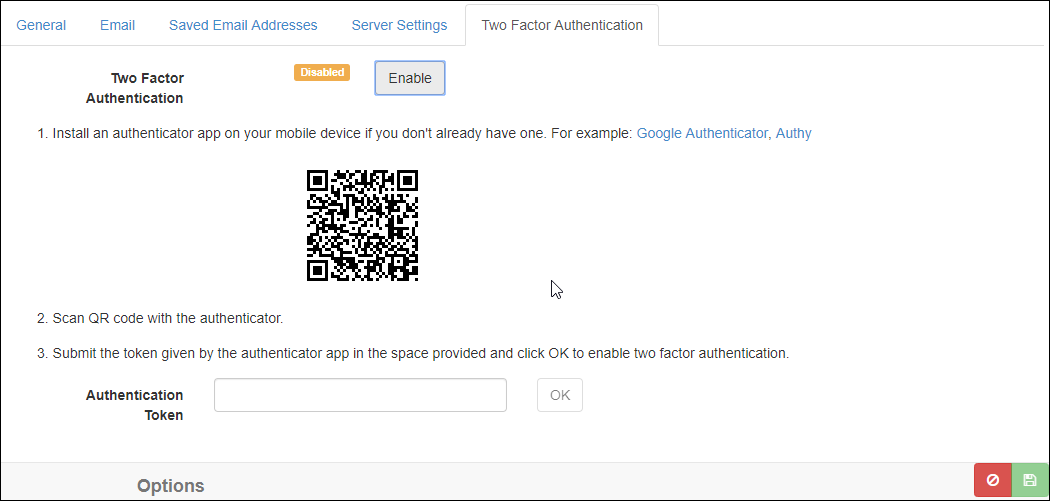
If you require extra security for your user account, you can enable Two-factor authentication on this tab. When this tab is opened initially, the status will be listed as Disabled. To enable Two-factor authentication, click the Enable button, and follow the on-screen instructions that appear. Once enabled, you’ll be prompted to enter a token from your authenticator app each time you log in.
To disable Two-factor authentication once it’s enabled, click the Disable button. You’ll be prompted to enter the token from your authenticator app.