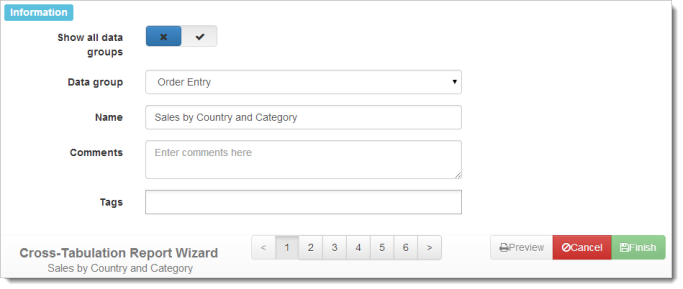
The first step in this wizard is to enter the following information:

-
Show all data groups: turn this on to see all tables in all modules in step 2 of the wizard.
-
Data group: the module to report on. Only those modules installed on your system and you have rights to appear. This doesn’t appear if Show all data groups is turned on.
-
Name: the name of the report. Although you can go to another next step without entering a valid name, you cannot click Finish to save the report.
-
Title: the title for the report. The title, which defaults to whatever you entered for Name, appears at the top of every page of the report. If you want to use an expression rather than fixed text, surround the expression with “{“ and “}” (without the quotes). Note that the expression must evaluate to a string value, so use the Str() function if necessary to convert non-string values such as dates and numbers to their string equivalent.
Here’s an example of an expression that displays “Sales for
" (such as "Sales for December 2015") in the report header: {"Sales for " + MonthName(Now()) + " " + Str(Year(Now()))}This expression displays the name of the report and the data source it reports on.
{Name + "\n" + DataSource}(The “\n” is a line break.)
-
Comments: any comments entered here appear in the Information window for the report in the Reports Explorer. You can expand the text area for entering comments by dragging the handle in the lower-right corner of the area.
-
Tags: the tags for the report. Click in the tags area to display a drop-down list of tag names. Select one from the list to add that tag to the report. To remove a tag, click the “x” to the left of its name. You can add as many tags as you wish to a report.
-
Data sources: Horizon Reports allows you to report on data from more than one data source in the same report (a data source is a particular database you want to report on). To do that, click in the data sources area to display a drop-down list of data sources to include in the report. Select one from the list to add that data source to the report. To remove a data source, click the “x” to the left of its name. You can add as many data sources as you wish to a report. If none are selected, the report includes data from the currently selected data source only.
Note that every table has a “Source Database” field that contains the name of the data source each record came from. Include this field in your report if you want to see which data source contained each record.
Note that if the report has an advanced layout, a message appears informing you of that.