The  button in the toolbar in the Reports Explorer allows you to specify export options for the report. You can also click the Export Options button in the Preview window. These options are used in the Preview window when you email the report or upload it to an FTP server.

Using the toolbar at the top of the Export Options window, you can pick a file output type, and then save, email, or upload the report to an FTP server. This allows you to directly output the report without previewing it first. The file types available for direct output are the same as those covered in the topic about previewing.
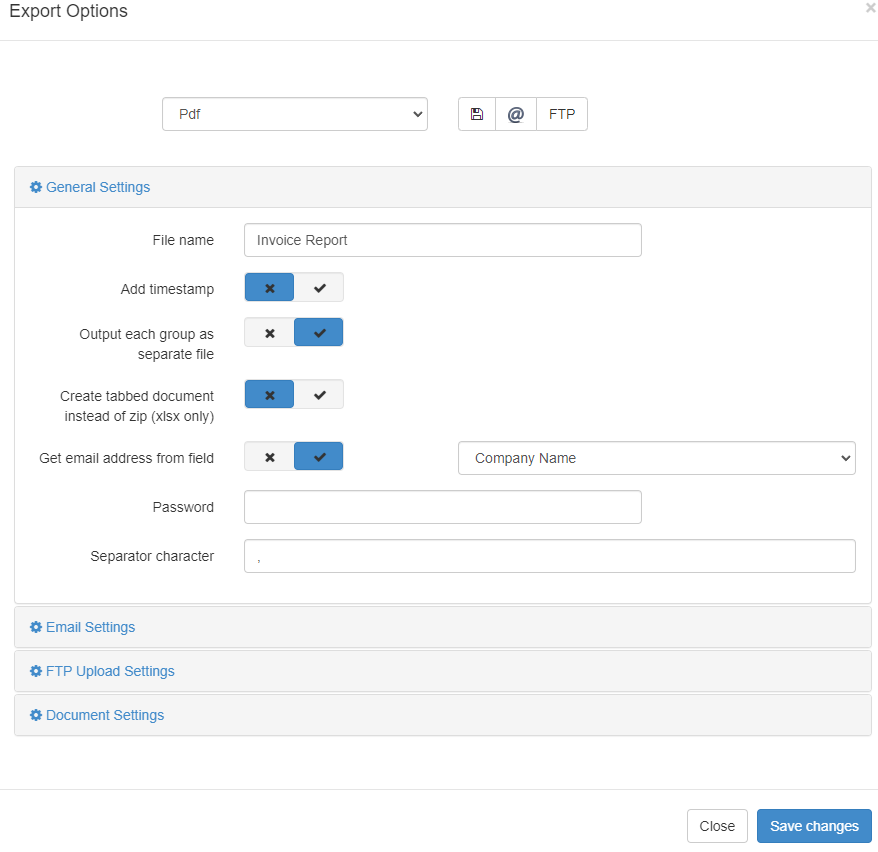
The export options are organized in to 4 categories, and each category will initially appear collapsed if the default settings have not been changed. Click on the category name to expand the section and make the options in that category visible.
The export options in the General section are:
-
File name: the name of the file to export to. Note: don’t specify an extension for the file, as one will be added automatically depending on the type of file you choose in the Preview toolbar.
-
Add timestamp: turn this option on to add a timestamp to the file name, using the format “YYYYMMDDHHMMSS.” For example, if the file name you choose is “My Report.PDF” and you run the report at 1:17 p.m. on March 25, 2014, the actual name of the file is “My Report 20140325131737.PDF.” This is useful if you output the report several times and don’t want each run to overwrite the same file.
-
Output each group as separate file: if you turn this option on, each group in the report is output as a separate file, with the file name being the name you chose followed by the group value. For example, if you have a report showing customers grouped by country and specify “Customers.PDF” as the file name, turning this option on results in files named “Customers Argentina.PDF” (including only customers from Argentina), “Customers Austria.PDF” (including only customers from Austria), and so on. This is useful if, for example, you want to create an invoice for each customer without having to run an invoice report multiple times, each with a filter on a different customer name. This option is only available if there’s at least one grouped field in the report. The individual files are zipped up into a single file which is downloaded to your browser.
-
Create tabbed document instead of zip: If you turn this option on, rather than generating an individual file for each group, a tabbed spreadsheet will be created, with each tab corresponding to a group on the report. This option is only available if Output each group as separate file is turned on, and will only work when outputting to an Excel document.
-
Get email address from field: this option, which is only available if Output each group as separate file is turned on, uses a field from the report as the email address to send the group’s file to. To follow the example from the previous item, suppose you wanted to email an invoice to each customer. Make sure the report includes the field containing the customer’s email address, even if the Display in report setting is turned off for that field, then turn on Get email address from field and select the field containing the email address from the drop-down list beside this option. This creates one file for each group and emails that file to the address indicated in the field you select.
-
Password: fill this in if you want to password protect the file. In the case of a PDF file, the file itself is encrypted; other file types are added to an encrypted ZIP file using the same name as the output file but with a “zip” extension.
-
Separator character: The character to use as a separator when outputting to CSV format. A comma is the default separator.
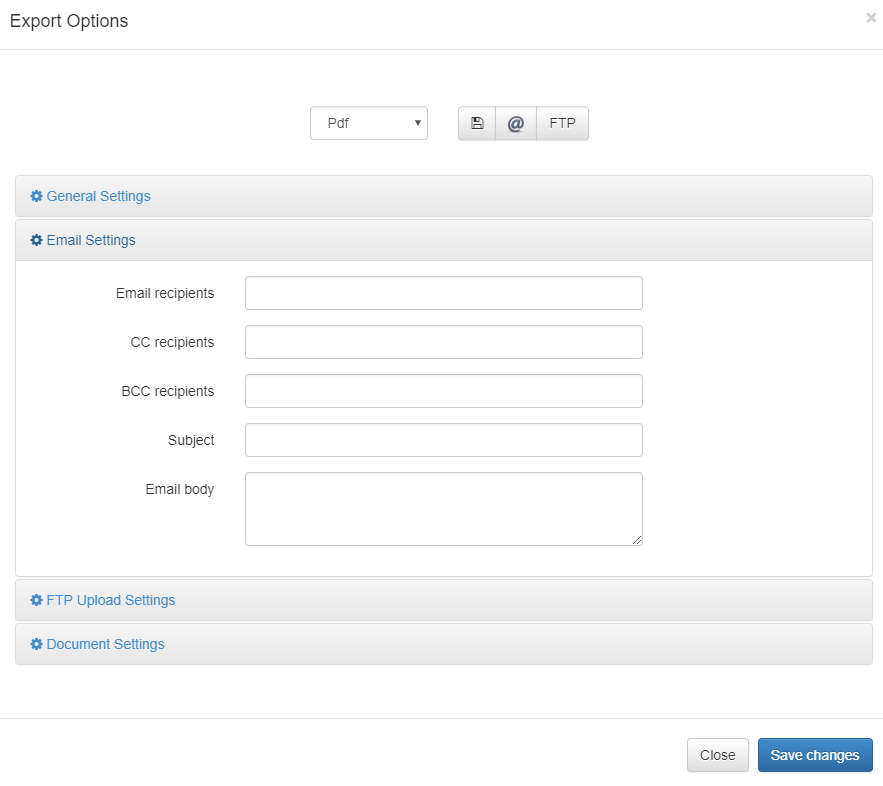
The options in the Email section are:
-
Email recipients: the recipients of the email. Any email address entered here is saved for future use. When entering values in this field, a drop-down list appears containing any recipients that have been saved previously. In addition to email addresses, you can also enter roles; this report will be sent to each user that belongs to that role (as long as they have an email address filled in).
-
CC recipients: the CC recipients of the email. Any email address entered here is saved for future use. When entering values in this field, a drop-down list appears containing any recipients that have been saved previously. In addition to email addresses, you can also enter roles; this report will be sent to each user that belongs to that role (as long as they have an email address filled in).
-
BCC recipients: the BCC recipients of the email. Any email address entered here is saved for future use. When entering values in this field, a drop-down list appears containing any recipients that have been saved previously. In addition to email addresses, you can also enter roles; this report will be sent to each user that belongs to that role (as long as they have an email address filled in).
-
Subject: the subject of the email. If you want to use an expression rather than fixed text, surround the expression with “{“ and “}” (without the quotes). Note that the expression must evaluate to a string value, so use the Str() function if necessary to convert non-string values such as dates and numbers to their string equivalent.
Here’s an example of an expression that displays “Sales for
" (such as "Sales for December 2015") in the report header: {"Sales for " + MonthName(Now()) + " " + Str(Year(Now()))}This expression displays the name of the report and the data source it reports on.
{Name + "\n" + DataSource}(The “\n” is a line break.)
-
Email body: the body of the email. Like Subject, you can use an expression in Email body.
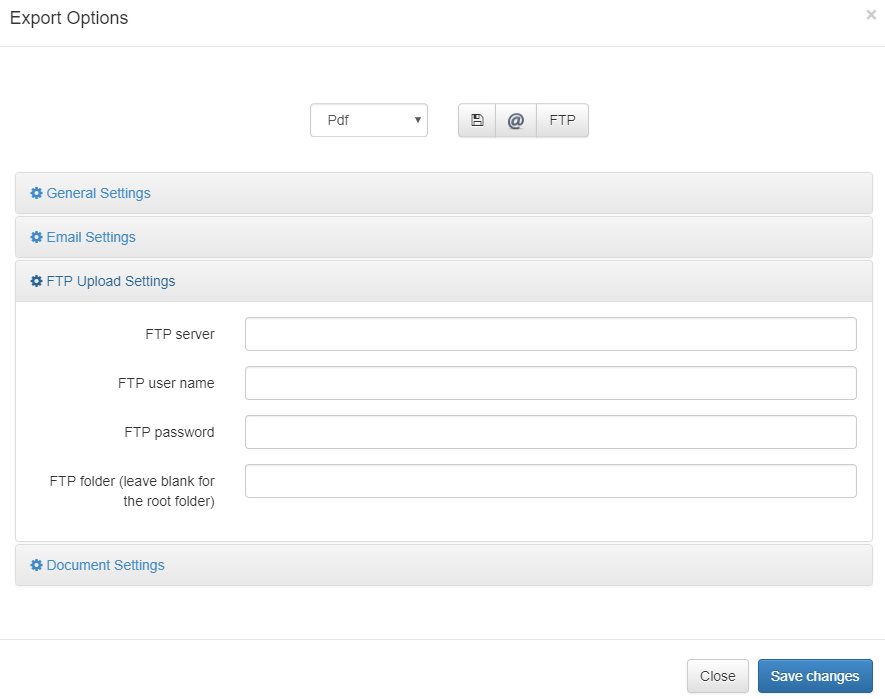
The options in the FTP section are:
-
FTP server: the URL for an FTP server to upload the file to. If the server supports SFTP, prefix the server address with sftp://
-
FTP user name: the user name to connect to the FTP server.
-
FTP password: the password to connect to the FTP server.
-
FTP folder: the folder to upload to on the FTP server. Leave this setting blank to use the root folder.
The options in the Document section are:
-
Document title: the title for the document when exporting to PDF.
-
Document author: the author for the document when exporting to PDF.
-
Document keywords: the keywords for the document when exporting to PDF.