Horizon Reports has a scheduler to run certain reports at certain times. For example, you may have a report named Daily Activities that you want emailed to someone every morning at 7:00 am.
Creating a new schedule requires email settings to be set in the Options dialog. If they aren’t, you get a warning message and the Schedule Wizard doesn’t open.
To schedule one or more reports, choose Schedule from the New menu to bring up the Schedule Wizard. Note that depending on how security is set up, the Schedule Wizard may not be available to all users.
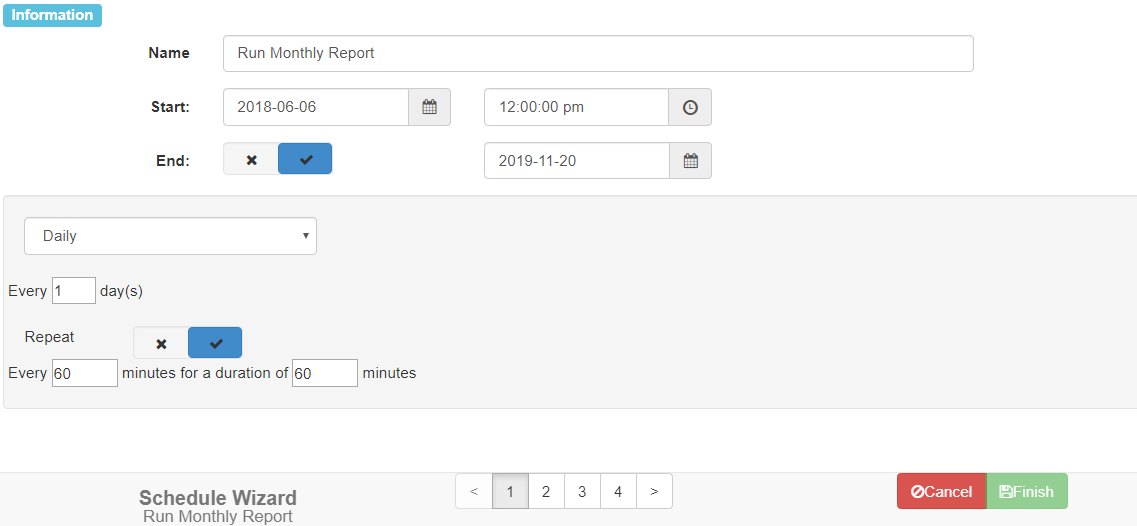
In Step 1, specify the name to assign to the schedule, the starting date and time for the schedule, whether the schedule ends or not, and if so, the ending date. Select how often the schedule is run: daily, weekly, monthly, monthly - day of month, or cron expression. For a daily schedule, choose how many days apart the schedule runs, such as every 2 days, whether the schedule should repeat, and if so after how many minutes it should repeat. If you specify that it should repeat, you can also specify the duration for the repeat interval.
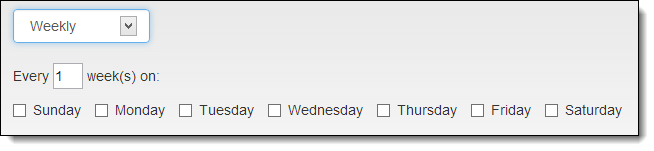
For a weekly schedule, specify how many weeks apart the schedule runs (such as every 3 weeks) and on which days to run the schedule.
For a monthly schedule, specify which date of every month (for example, the 15th) and which months the schedule runs on.

For a monthly - day of month schedule, select which day of the month (such as the second Monday) and which months the schedule runs on.

For a cron expression schedule, enter the cron expression that defines when the schedule should run. Horizon Reports uses Quartz style cron expressions. You can use a tool to help generate the cron expression you need.

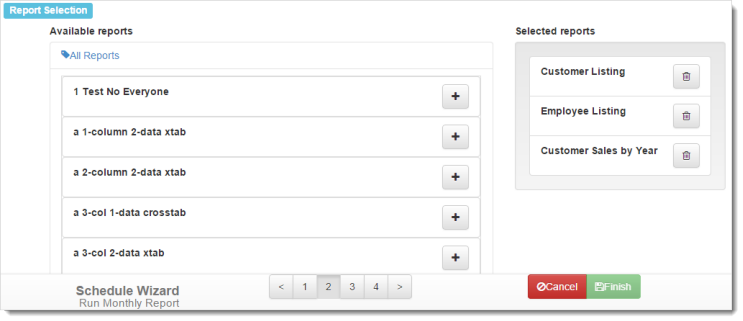
In step 2, choose which reports the schedule should run. Like the Reports Explorer, the Available reports list is organized by tag. To hide or show the reports for a tag, click the tag bar.
Click the  button to add a report to the Selected reports list. Click the
  button to remove a report from the Selected reports list.
Only reports without ask-at-runtime filter conditions are displayed, since a schedule can’t stop to ask for the values of such a report.

In step 3, choose each report and specify the export options for the report. You’ll also be able to choose the Output type of the schedule, where you can either Email or Upload (FTP) the report.
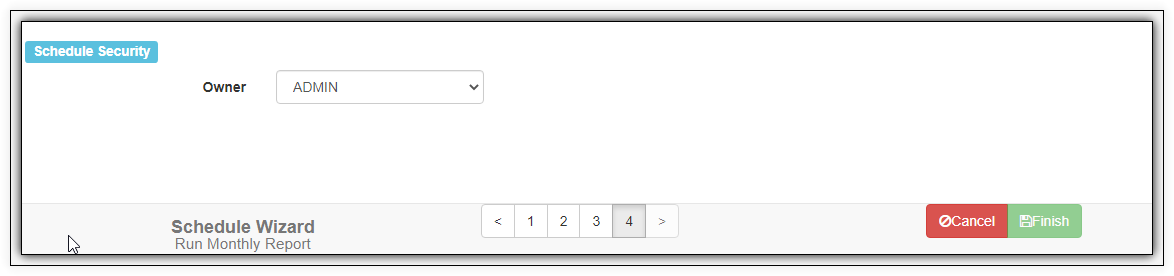
A schedule is owned by a particular user. By default, the creator of the schedule will be the owner. However, administrators can change the owner for a schedule in step 4.
When you are finished specifying the settings for the schedule, click the Finish button. The report runs automatically on a regular basis according to the schedule settings.
The Scheduler is automatically displayed after saving a schedule; you can also access it by choosing Scheduler from the menu. The Scheduler shows the schedules you created (unless you are an administrator user, in which case you can see all schedules), including when they run and which reports are output.

Each schedule in the list has one of four status icons beside the name of the schedule.
-
 - The schedule ran successfully.
 -
 - An error occurred when the schedule last ran.
 -
 - The schedule hasn’t been run for the first time yet.
 -
 - The schedule is currently running.
To edit a schedule, click the  button beside the schedule name; that launches the Schedule Wizard so you can change any settings you wish.
To delete a schedule, click the button beside the schedule name.
Note that the Schedule Wizard adds the name of the data source to the schedule so the report is run against the data source open when the schedule was created rather than the last data source accessed.